Elementor Page Builder: The Ultimate Guide
In today’s digitized world, a visually attractive, user-friendly website is recommended for businesses or individuals looking to make exposure online. With Elementor page builder, you have a powerful tool at your fingertips to develop attractive and stunning website themes without requiring any coding knowledge.
After reading this article, you will be able to build your own unique website page layout using Elementor. We have posted many Elementor-built websites on our website, and you can check out those themes later.
This ultimate guide to Elementor will walk through every aspect of this page builder, including pros and cons, advantages, benefits, what you can achieve through Elementor Page Builder, and many more.
Table of Content
How to Install Elementor Page Builder
Installing Elementor is easy and quick, like installing any other plugin on WordPress. You can download the free or paid version of Elementor page builder from their official website as well.
Installing Elementor Page Builder via WordPress Dashboard
Step 1: Ensure you’re in your WordPress dashboard, click Plugins, and then Add New.
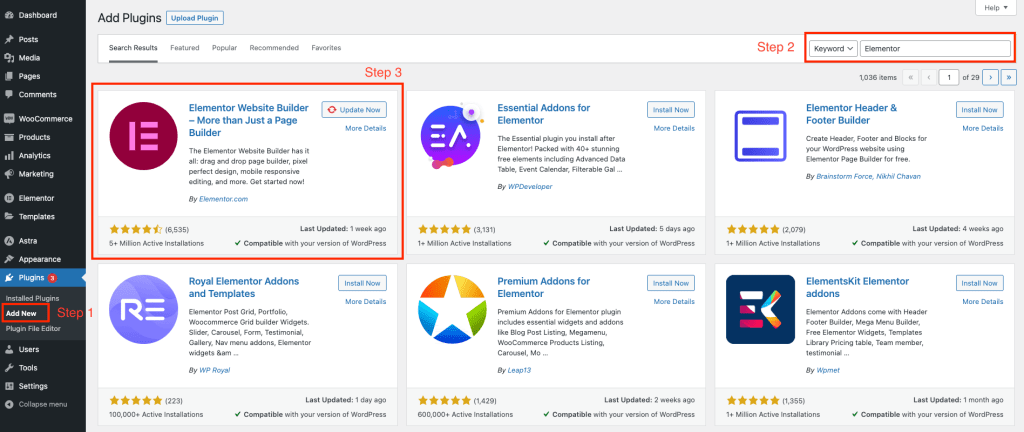
Step 2: Type Elementor on the search bar and locate the Elementor Free Website Builder by the Author Elementor.com.
Step 3: Once you find the Elementor Website Builder, Click the install button.
When you install the Elementor page builder, it will automatically be added to your WordPress sidebar. You can adjust your Elementor back-end settings using the sidebar shortcut.
How to Use Elementor Website Builder in WordPress
Elementor page builder lets you create your website layout from scratch without using HTML coding or CSS styles. You can edit the whole layout using this page builder, allowing you to preview your changes or features while working on changes on your website.
Elementor provides a broad range of features and customisation options to transform your website into a fully visualised masterpiece.
Create Your First Page Using Elementor Page Builder
Step 1: Go to your WordPress main dashboard and select Pages from your left sidebar. When you hover over or click on Pages, you will see the Add New option. Click on Add New to create your very first WordPress page.
Step 2: Add a page title once you create your new page. In this example, I have given the page title “Your First Page Using Elementor.” The page title is your H1, and you have to make sure you don’t add any more H1 tags other than your page title in your page.
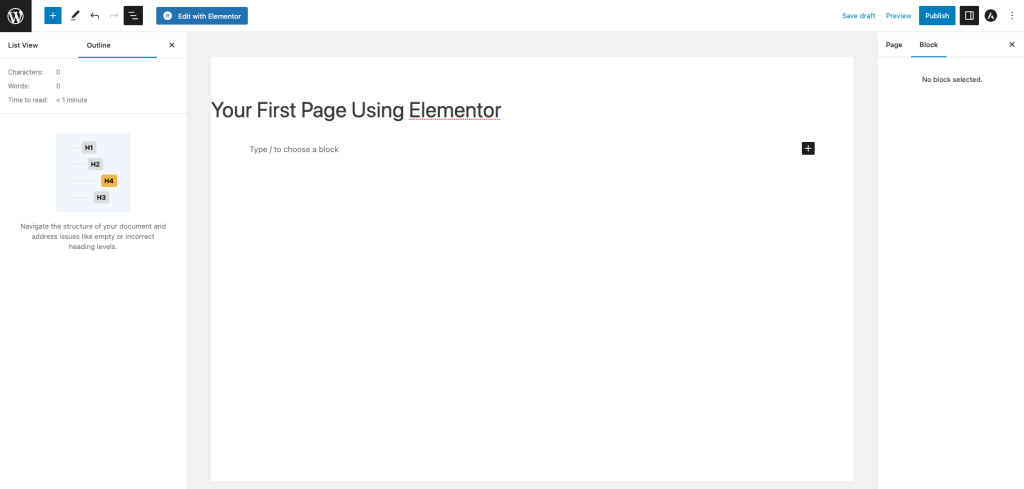
Step 3: Once you are given the page title, click the Edit with Elementor button.
Step 4: This is how your editor space looks after clicking the Edit with Elementor button.
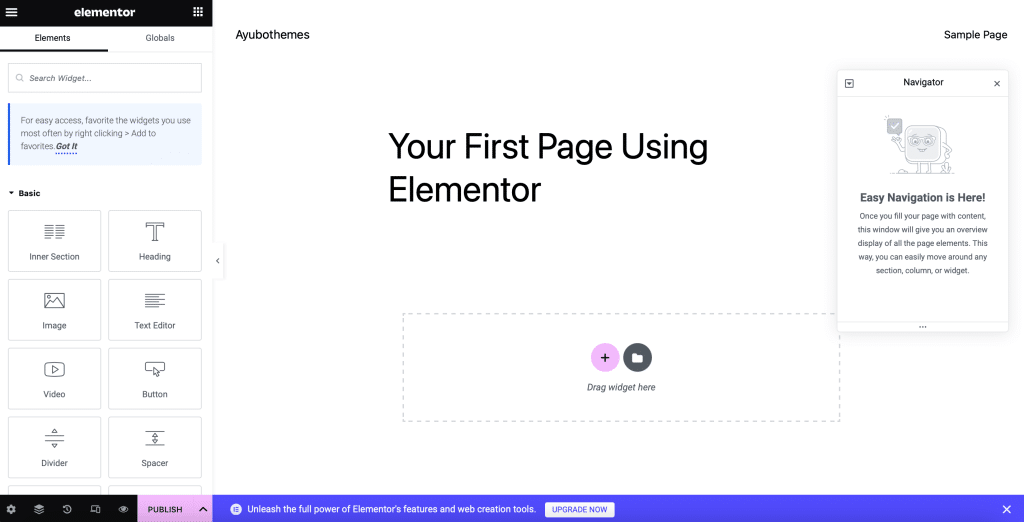
You can see the widget section on your left-hand side and your column navigational pop-up on your right-hand side.
Step 5: First, you must select a layout for your page before editing. You can choose your page layout by clicking the cog icon (setting icon) in your bottom left corner.
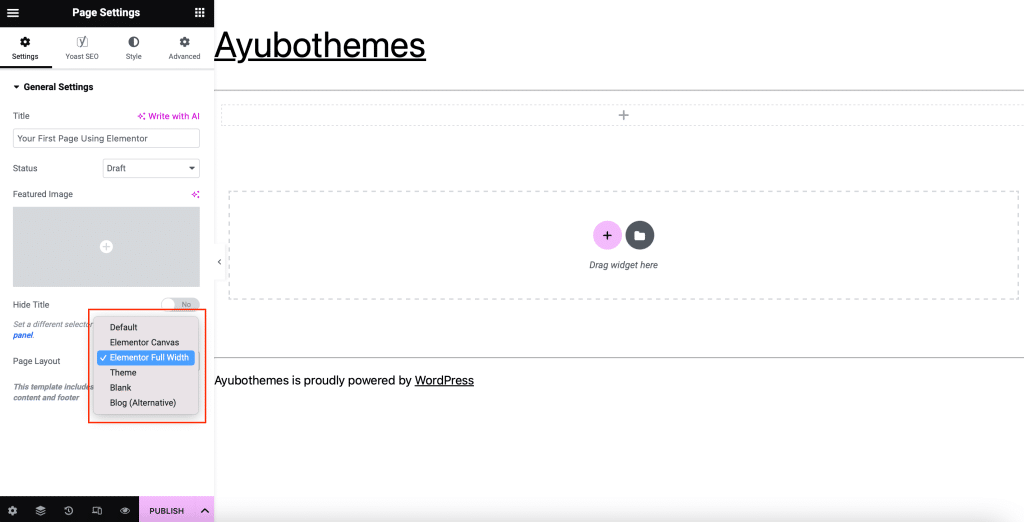
You can select your preferred page layout in the drop-down. We will go with the Elementor Full Width page layout in this article.
Step 6: Getting to know this page builder requires understanding its three main building blocks, which are Sections, Columns, and Widgets.
Sections are the main block of the Elementor. Inside sections, you can add as many columns, and you can put the widgets inside the columns.
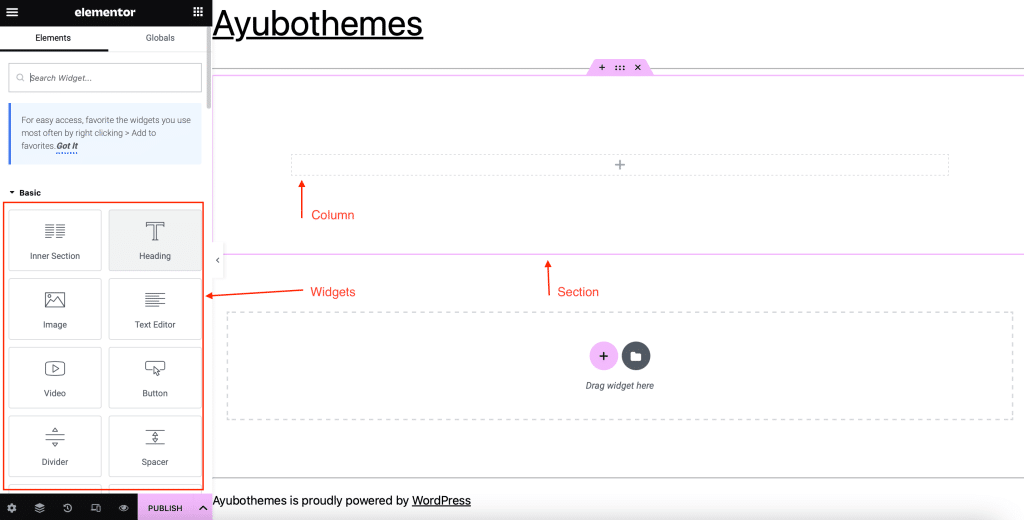
You can use any free widgets from your left sidebar and drag and drop it to the columns. Elementor editor will highlight where you can drop your widgets. You can’t drag and drop widgets on headers and footers outside your section.
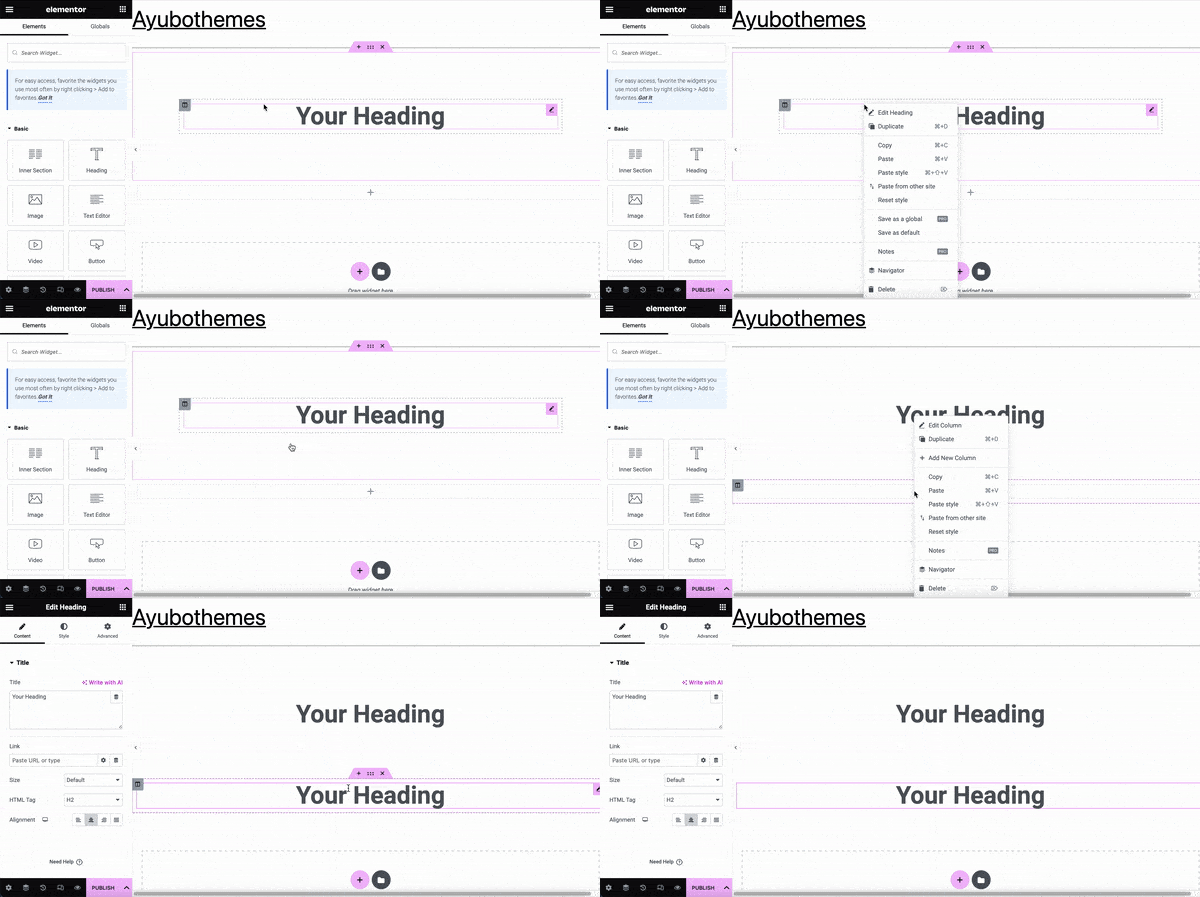
Step 7: You can control the sections, columns, and widgets by right-clicking on the building block.
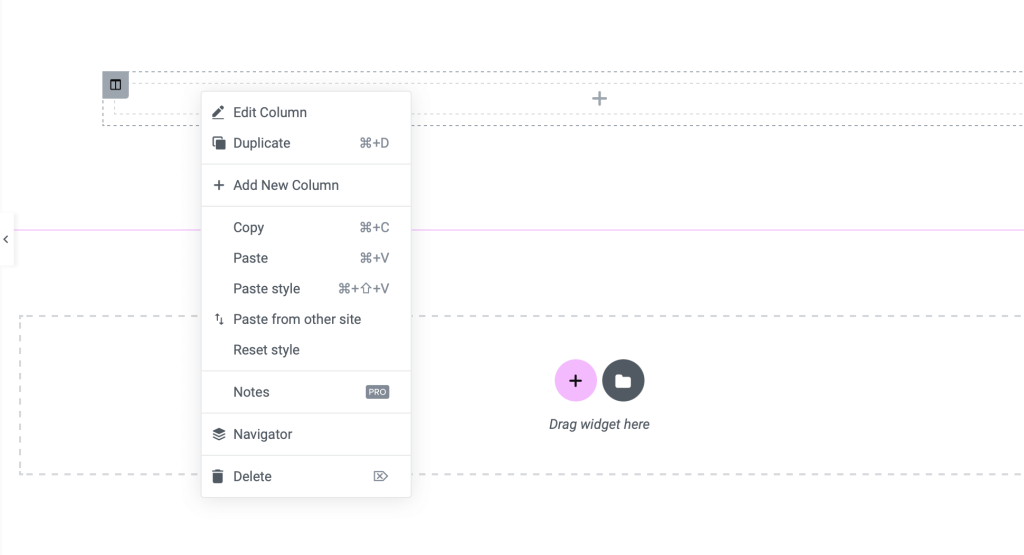
You can duplicate a section, column, or widget by right-clicking on its building block.
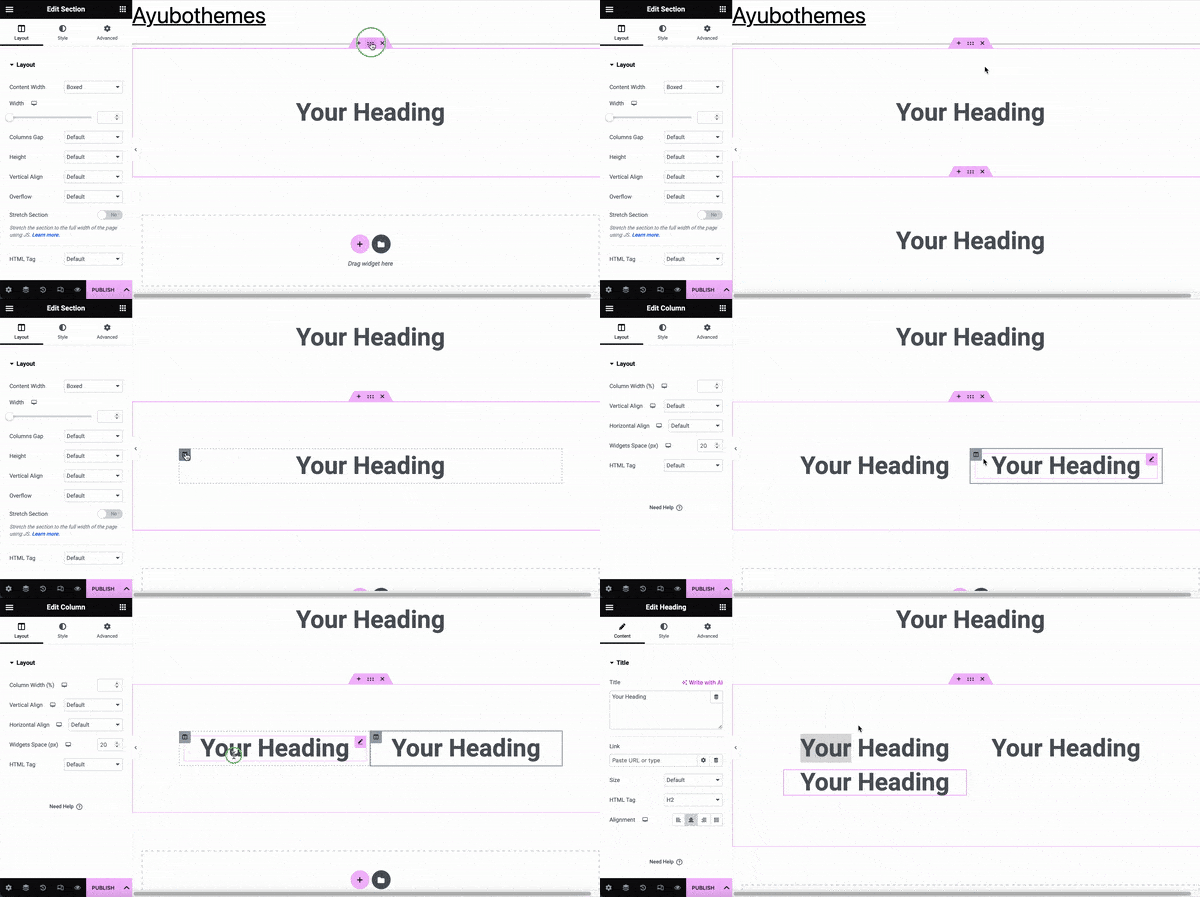
You can copy widgets and their styles as well.
Work with Elementor Widgets
Step 7: Elementor builder Widget section is on the page editor’s left side. You can search for a specific widget or scroll through the widgets to find the one that you are looking for.
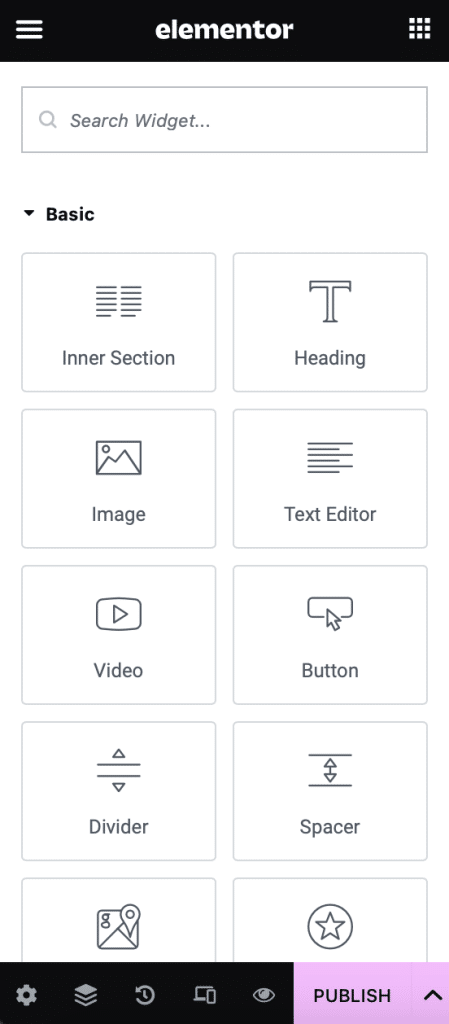
You can choose the essential elements like heading, image, text editor, and button or explore more advanced widgets like posts, gallery, form, etc. Advanced elements are only available on the pro version.
Editing a Section
To edit a section, you must select the section you want to edit into an editing mode by clicking the section handle.
Once the section is turned to editing mode, you can go to the widget panel on your left side to edit the section. In the editing mode, you can find three tabs: Layout, Style, and Advanced. Each tab has unique options.
Layout Tab
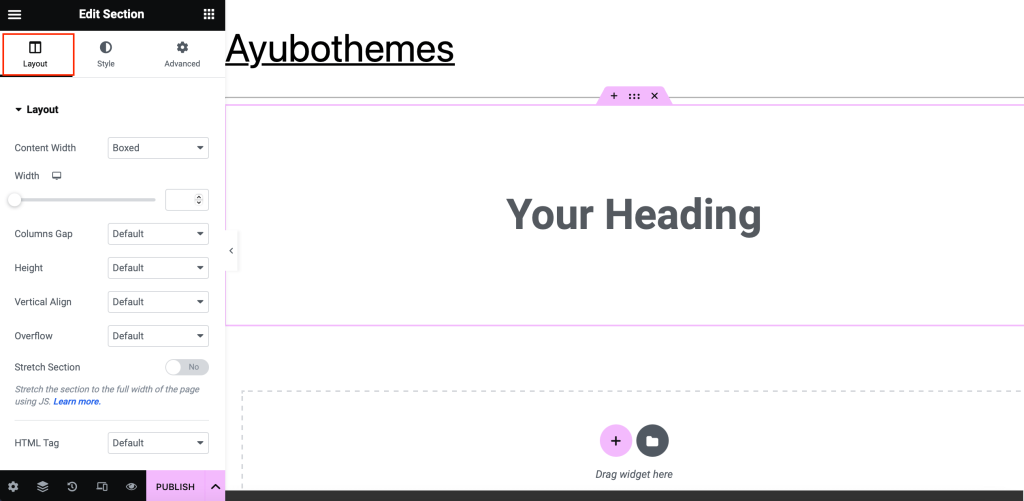
You can control the structure and arrangement of the section’s elements in the Layout Tab. Here are some lists of the key features and options you will find in the Layout Tab.
Section Width/Height: You can control the width and height of a section, and there are options like full width, boxed, or custom dimension.
Column Structure: You can adjust the width ratios of the columns.
Column Gap: You can control the space between columns within the section.
Vertical Alignment: You can align the content within the section vertically. You can choose options like the top, middle, bottom, space between, space around, or space evenly.
Style Tab
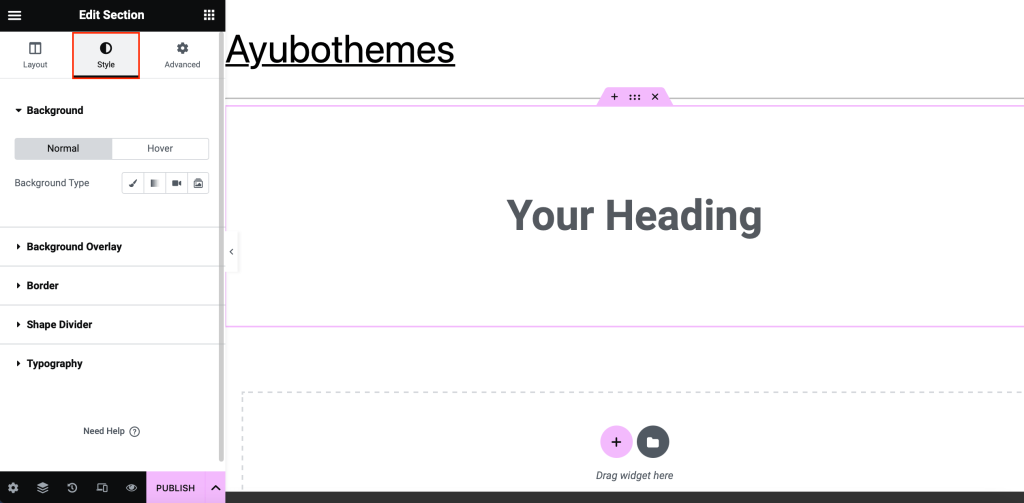
Style Tab in Elementor page builder lets you customize the appearance of the section’s elements. You can modify colors, typography, background, overlay, borders, and shape.
Advanced Tab
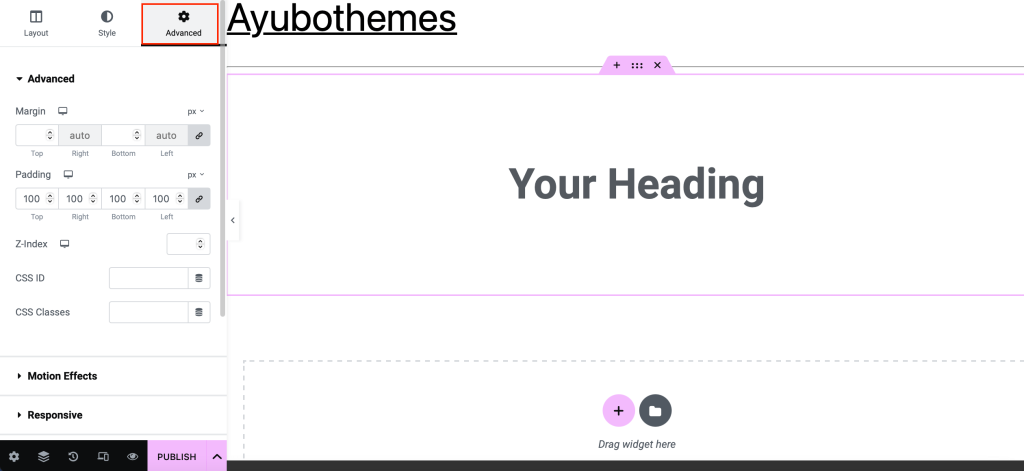
The advanced tab helps you with additional options to customize your section’s behavior and appearance. Key features of the Advanced tab are,
Margin: You can customize the space around your section.
Padding: You can customize the space within your section.
Z-Index: This option determines the stacking order of elements within the section.
CSS Classes: You can provide a custom CSS Class to your section, column, or widget.
Motion Effects: This feature lets you add parallax effects and animations to your section.
Responsive: This helps you control how the section appears on different screen sizes.
Custom CSS: You can add CSS to override or extend the default Elementor builder styles.
Change Your Website Font and Colors
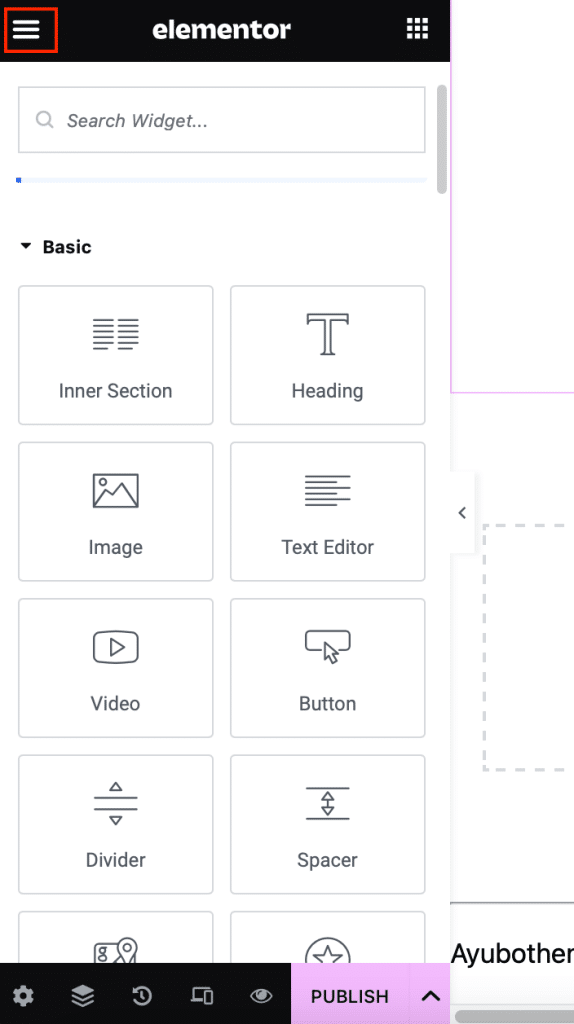
Step 8: To change your global font family and theme colors, click on the menu icon in the top left corner of your widget section, then click on the Site Setting.
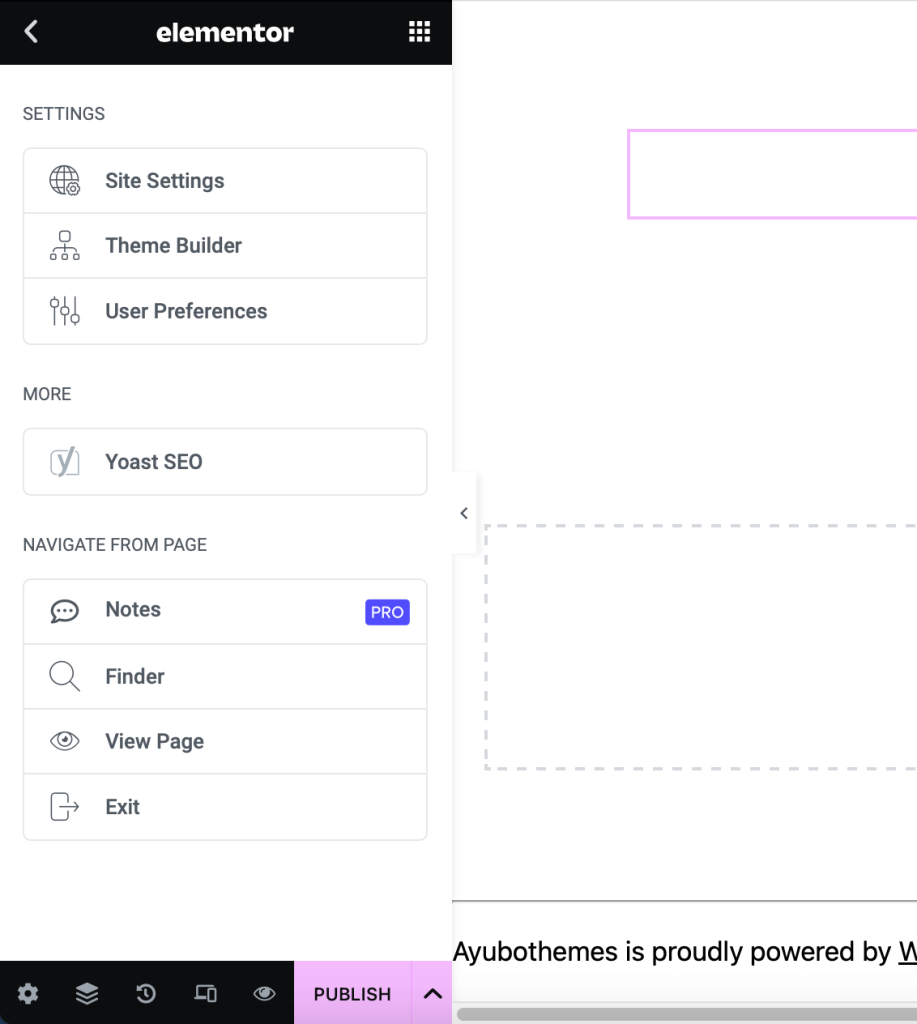
You can adjust the global colors, fonts, typography, button styles, site identity, theme builder preferences, and more.
Step 9: If you mess up your website while building it, don’t worry. You can revise the mistake and return to your website’s old version by clicking on the clock icon in your bottom left corner.
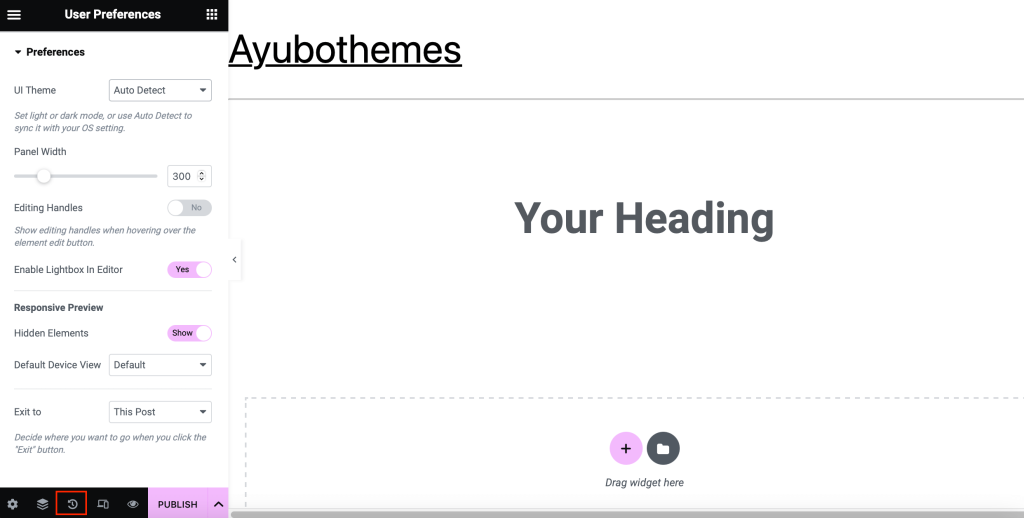
Finally, When the changes and revisions are done, you can publish or update the website to make the changes apply to your live site.
